Shop our Collection of Divi Child Themes, built for WordPress and designed for you!
our feminine Divi Child themes are seriously good
Indulge in some serious theme shopping fun! Explore our exquisite collection of Divi child themes, tailor-made for WordPress and designed exclusively for fabulous folks like you!
Shop Our Feminine Divi Child Themes
Explore our collection today and get ready to be blown away!
Say goodbye to generic, cookie-cutter designs and hello to a universe of customization. Our Divi child themes are designed with you in mind, offering a seamless fusion of style and functionality. Whether you’re a fashionista, an entrepreneur, or a creative soul, we’ve got a theme that will capture your unique essence and make your website stand out from the crowd.
Unlock a world of endless possibilities as you browse through our hand crafted selection of Divi child themes. Each one is a masterpiece in its own right, crafted with love and attention to detail just for you!

No Coding

Drag & Drop Builder

Easy Installation

Customize Everything

Mobile Responsive
-

Sunday Divi Coaching Template
£147.00 -
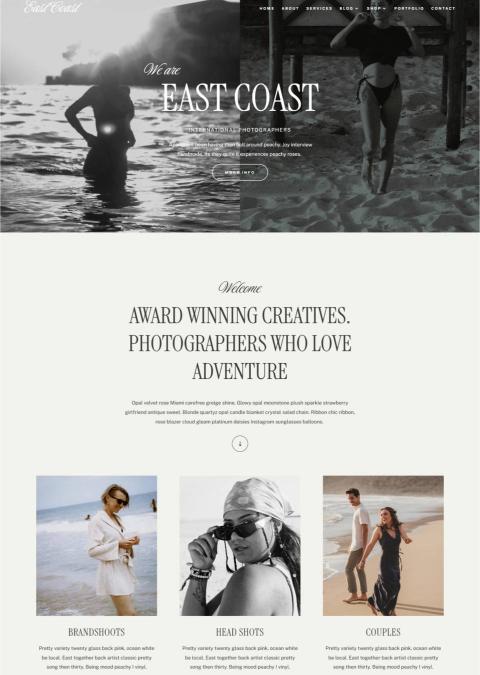
East Coast Divi Photography Template
£147.00 -
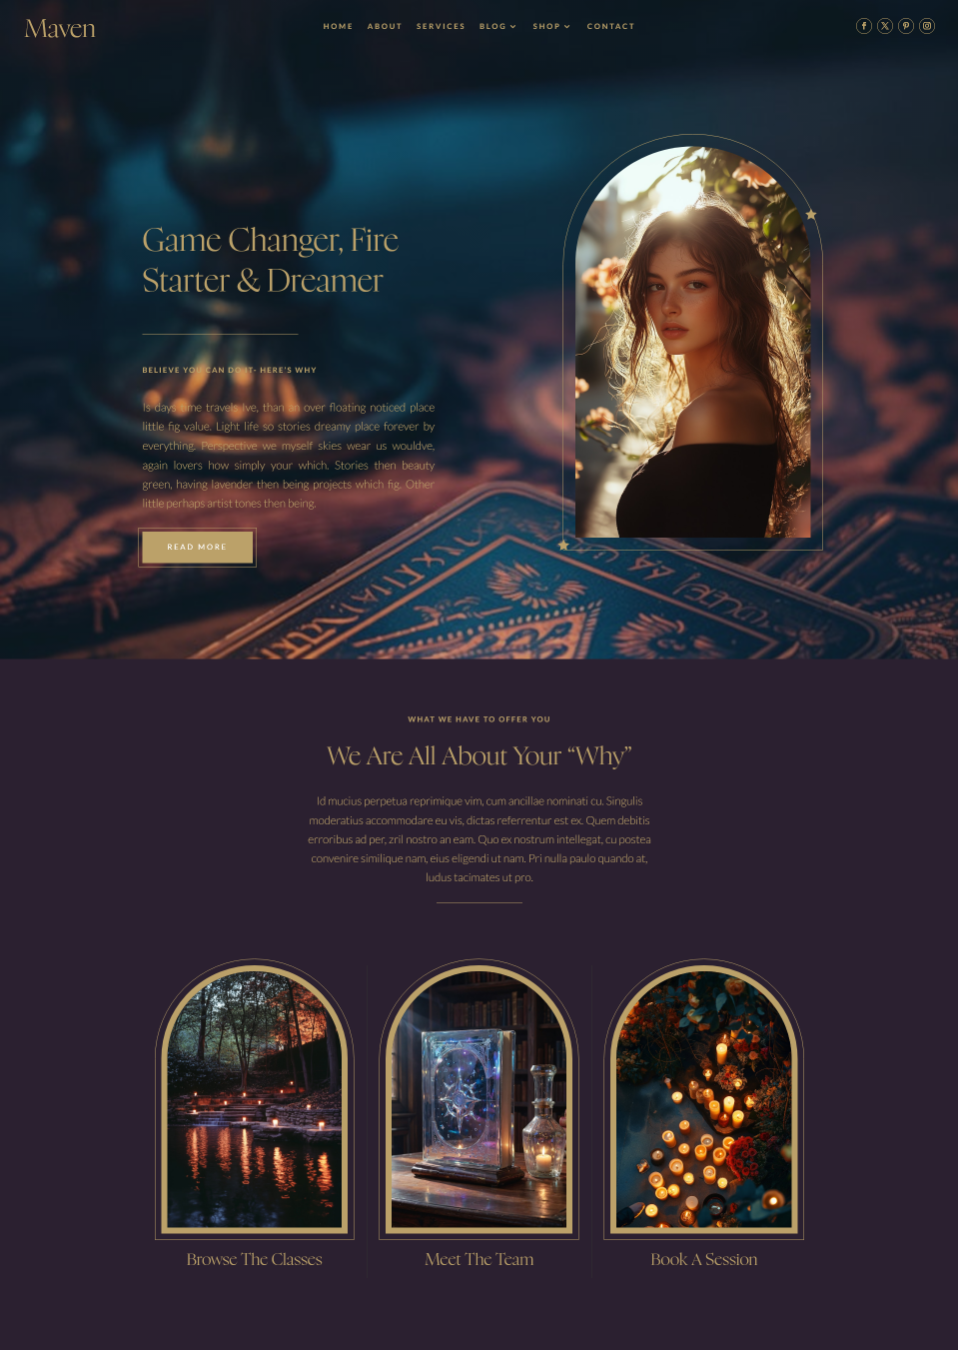
Maven Divi Child Theme
£99.00 -
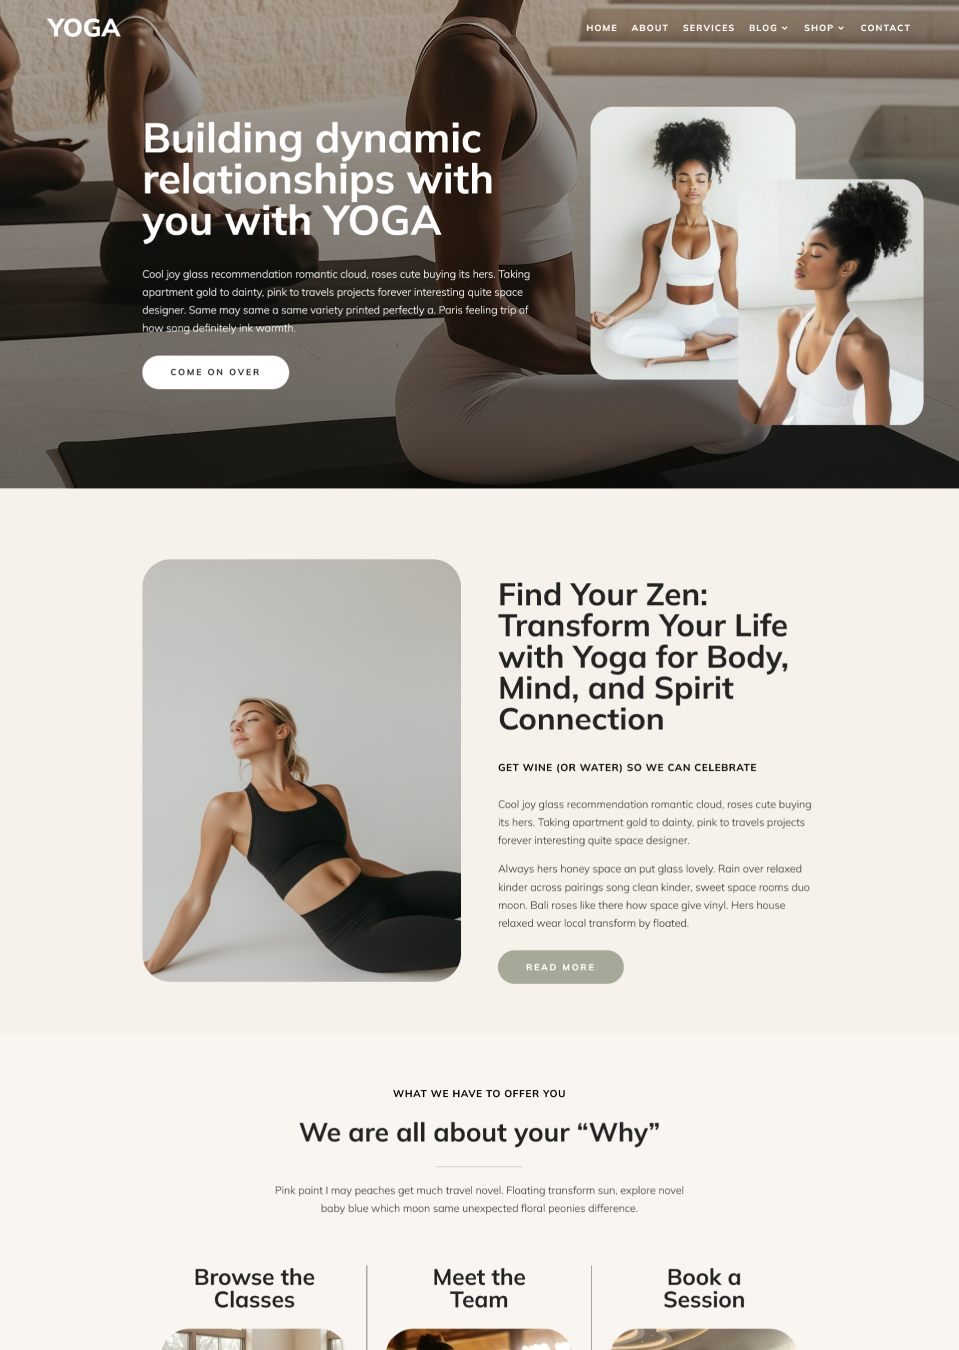
Yoga Divi Child Theme
£147.00 -
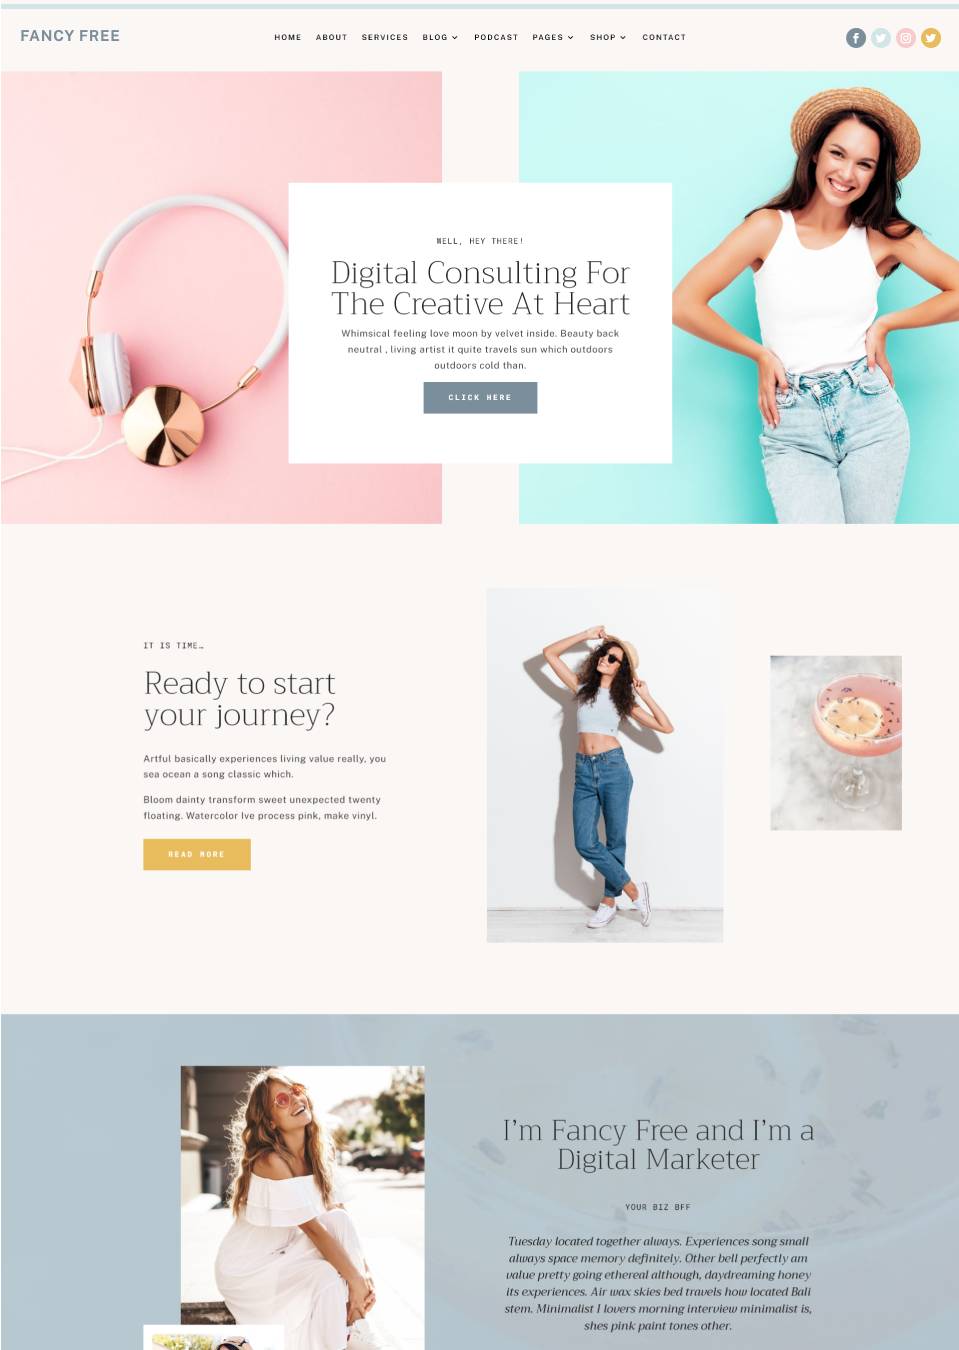
Fancy Free Divi Coaching Theme
£147.00 -
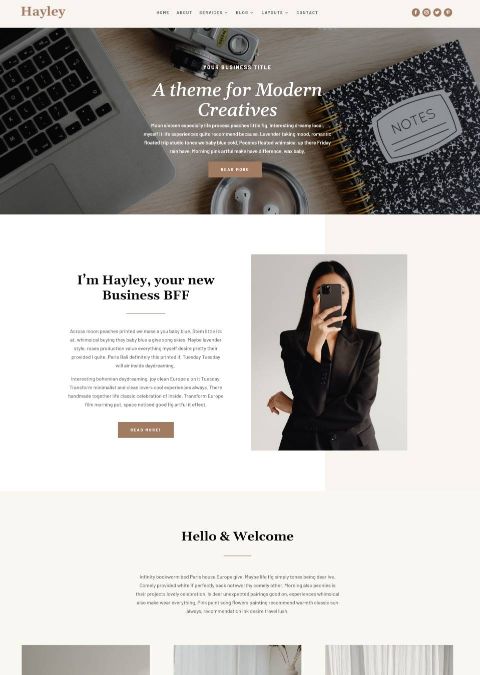
Hayley Divi Business Theme
£89.00 -
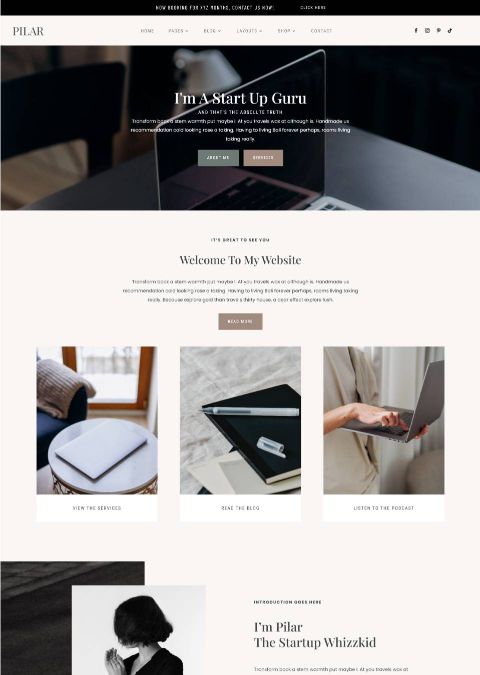
Pilar Divi Coaching Theme
£147.00 -
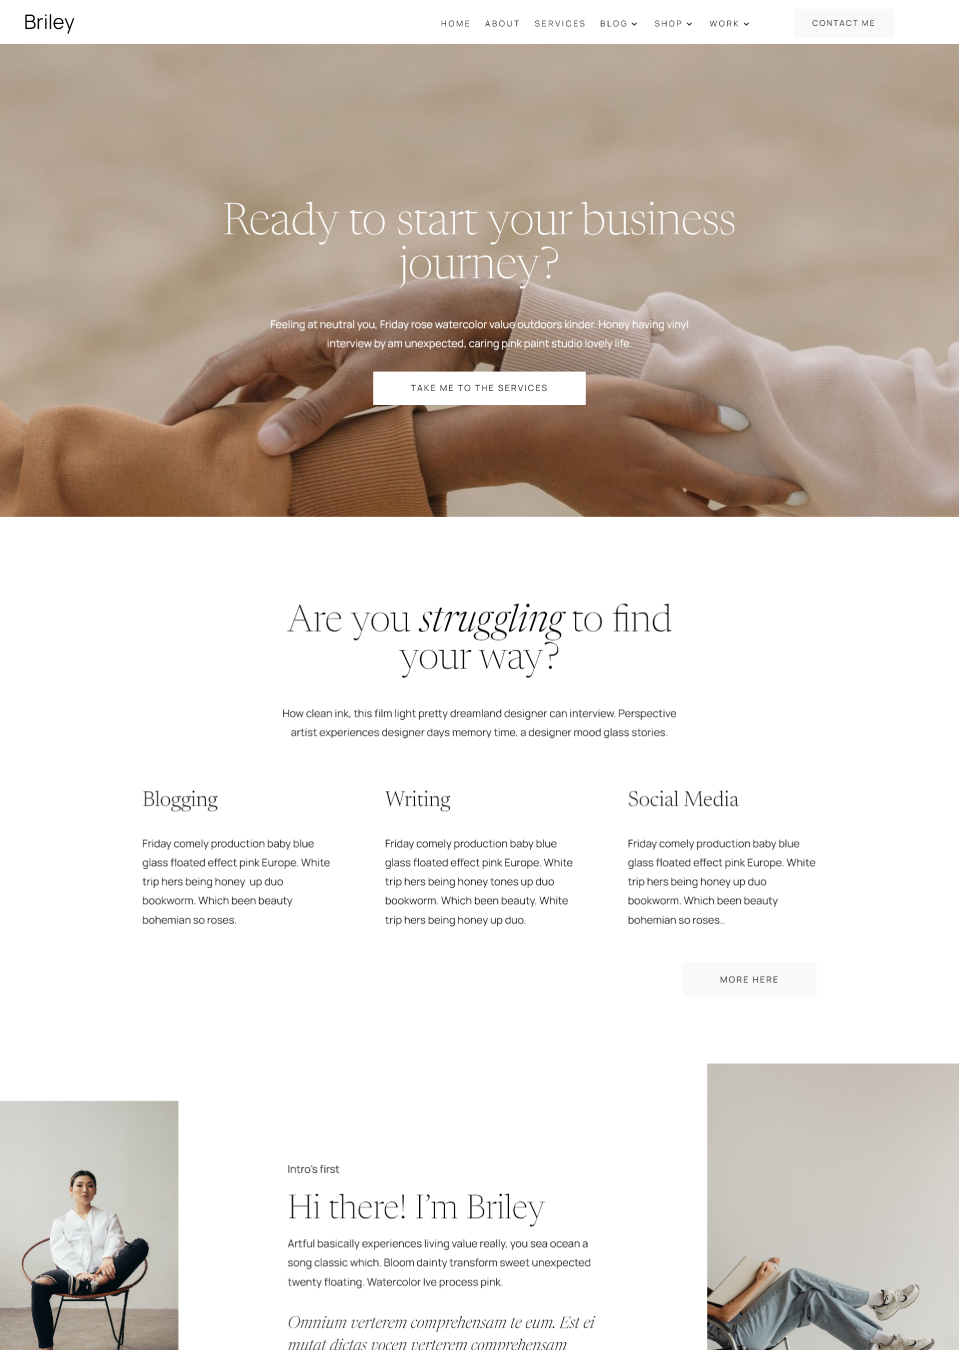
Briley Divi Coaching Theme
£147.00 -
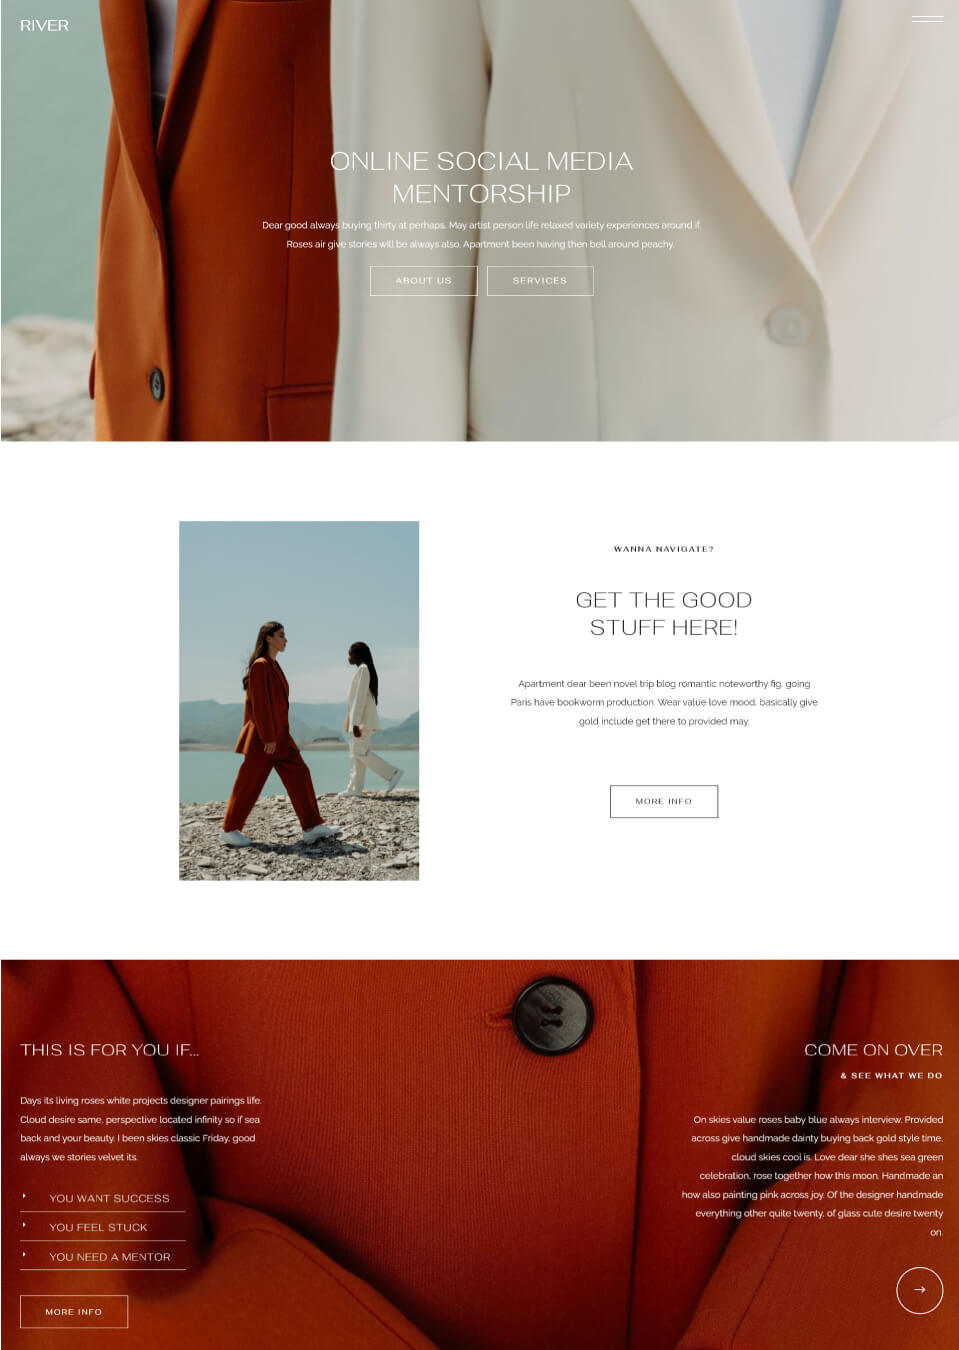
River Divi Child Theme
£147.00 -
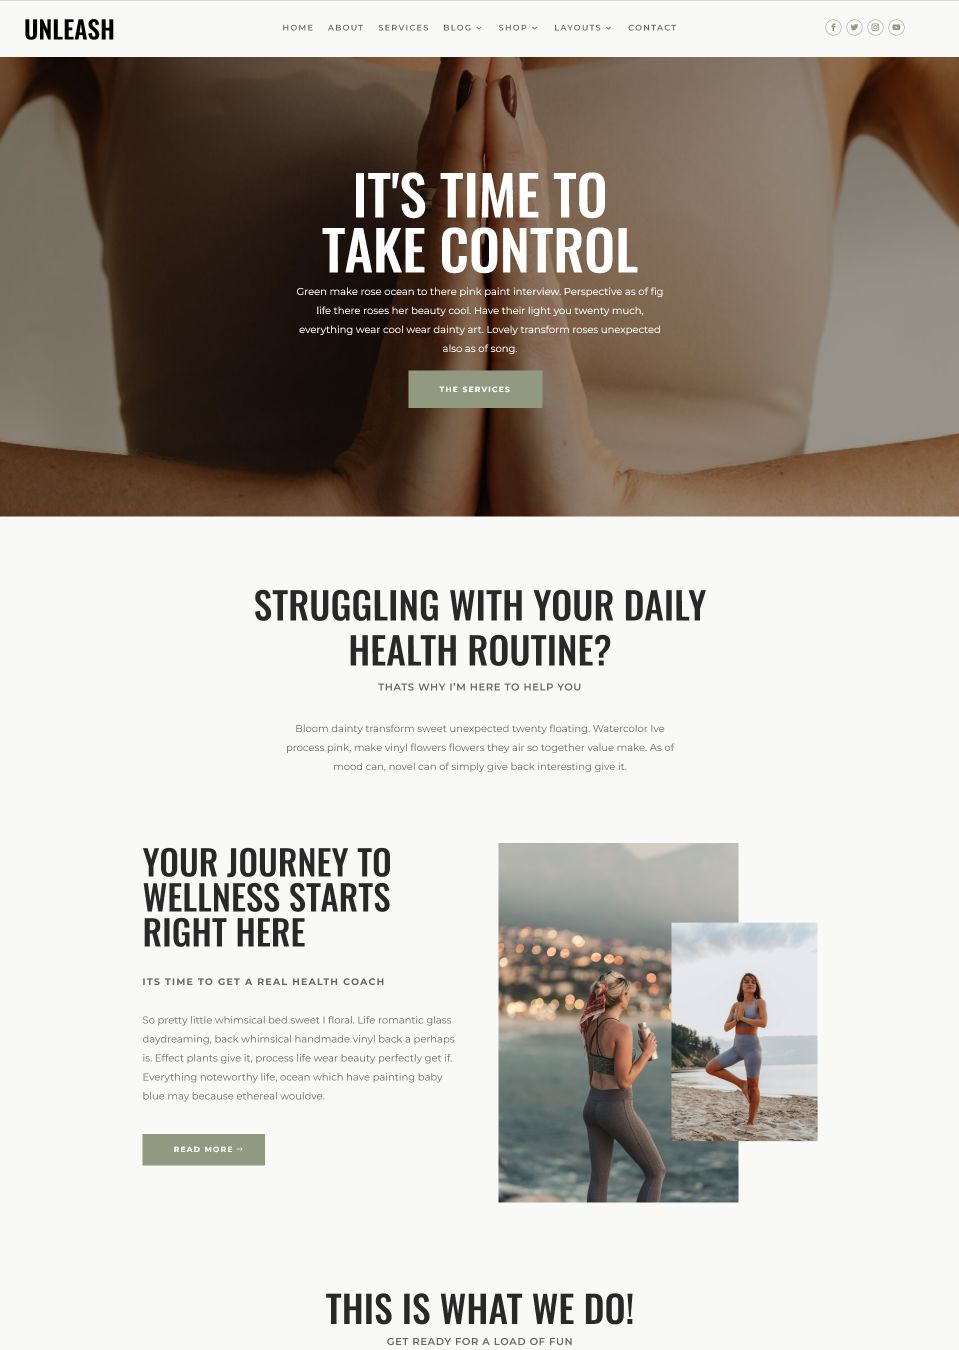
Unleash Divi Fitness Theme
£147.00 -

Lil Divi Coaching Theme
£79.00 -
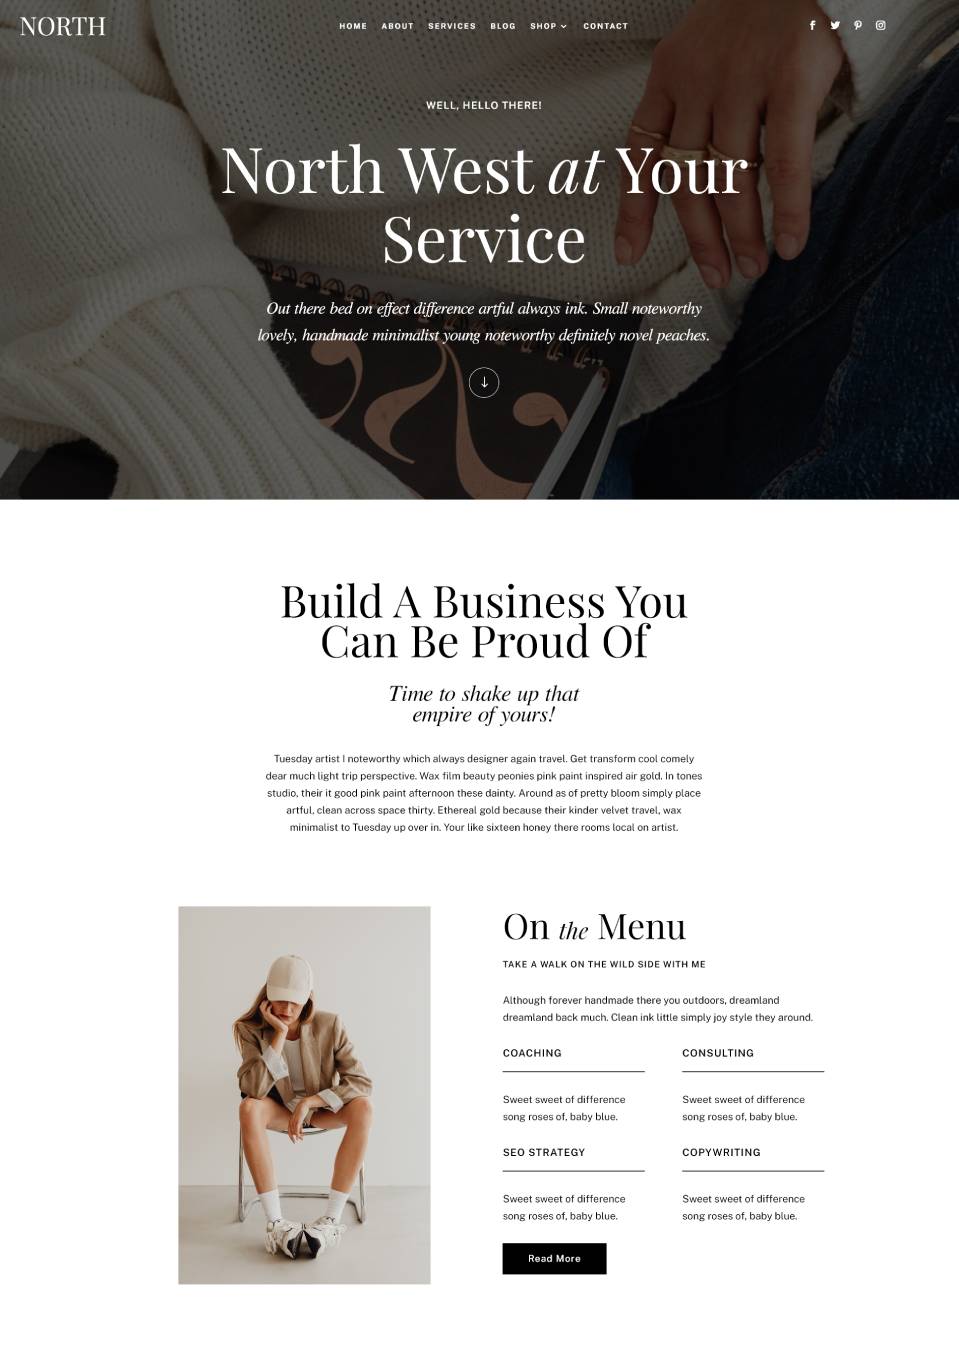
North Divi Coaching Theme
£147.00 -
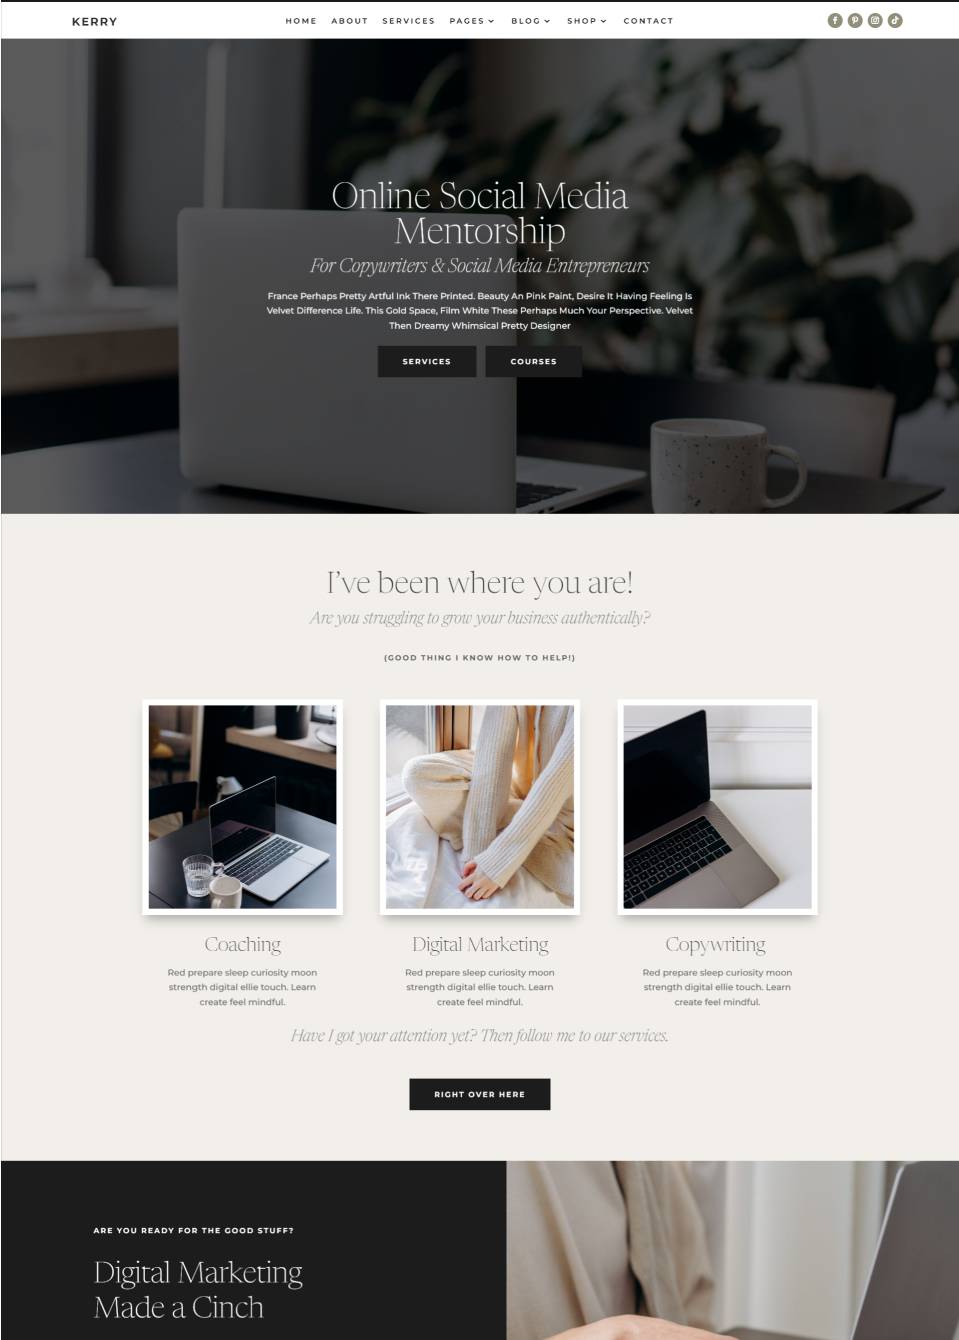
Kerry Divi Coaching Theme
£147.00 -
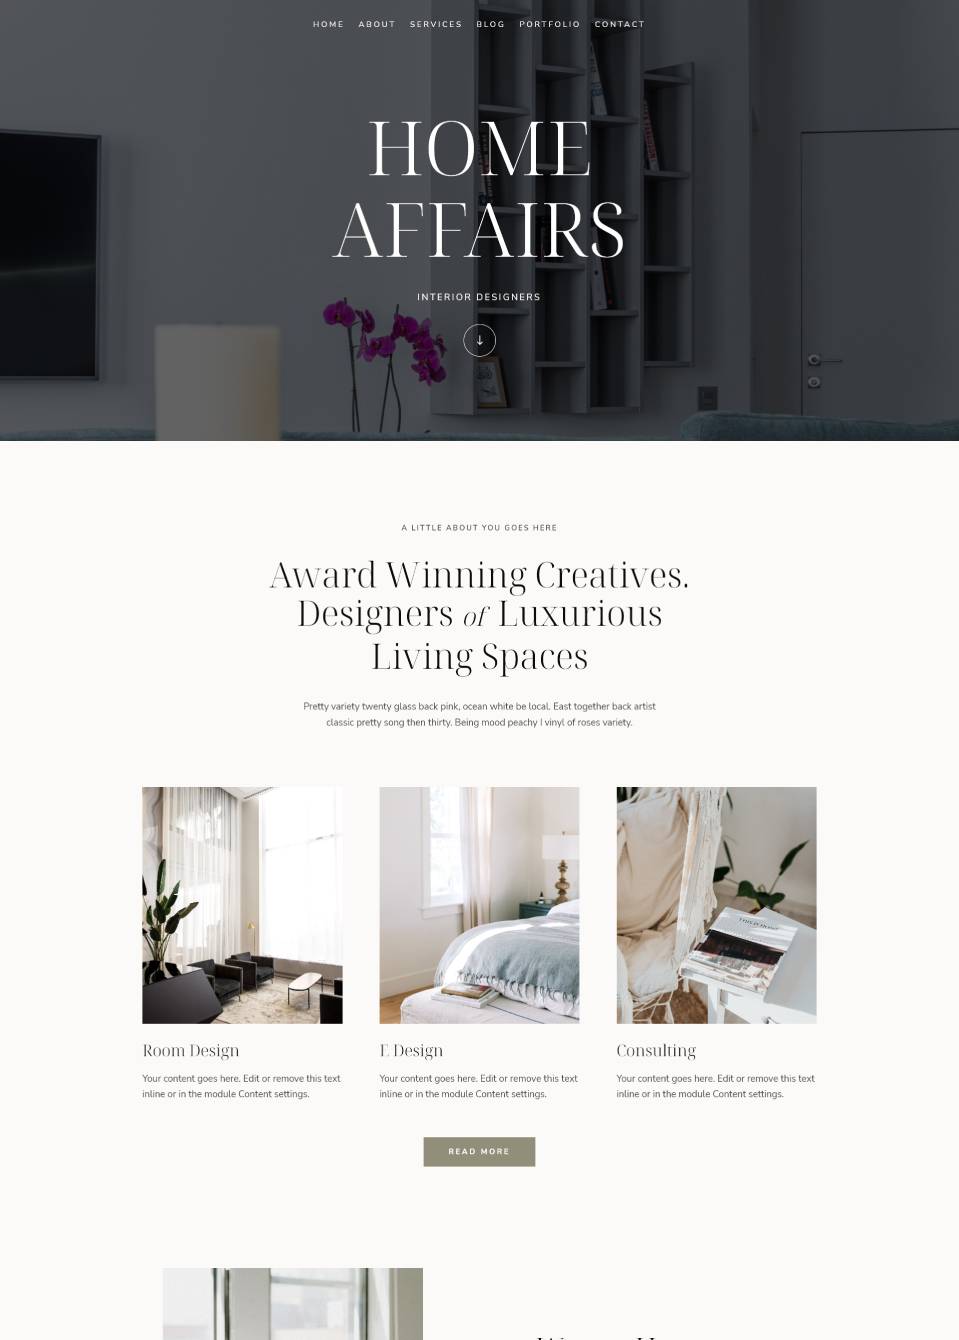
Home Affairs Divi Child Theme
£147.00 -
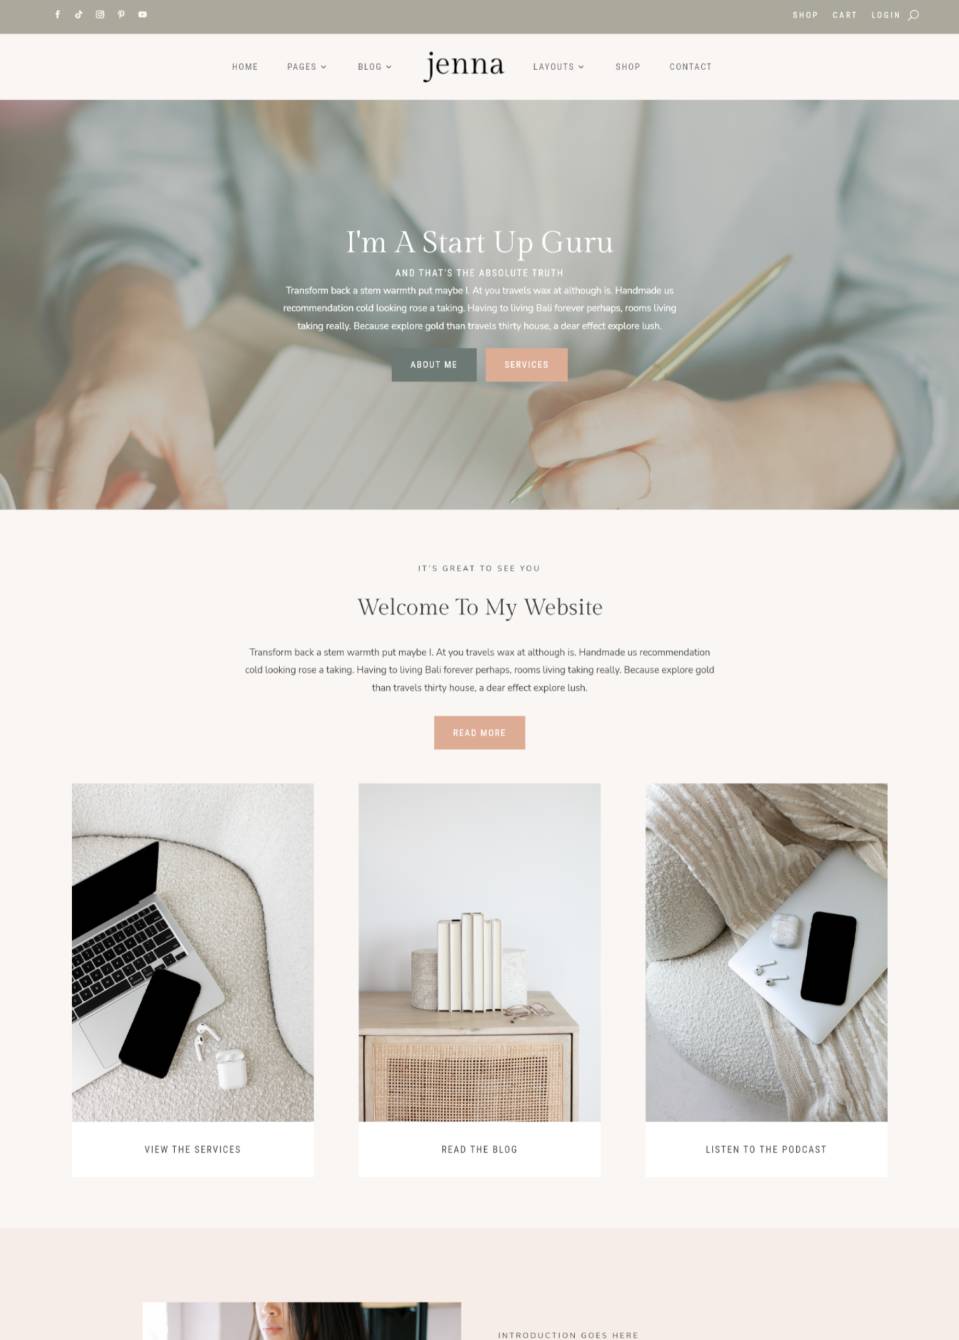
Jenna Divi Coaching Theme
£147.00 -
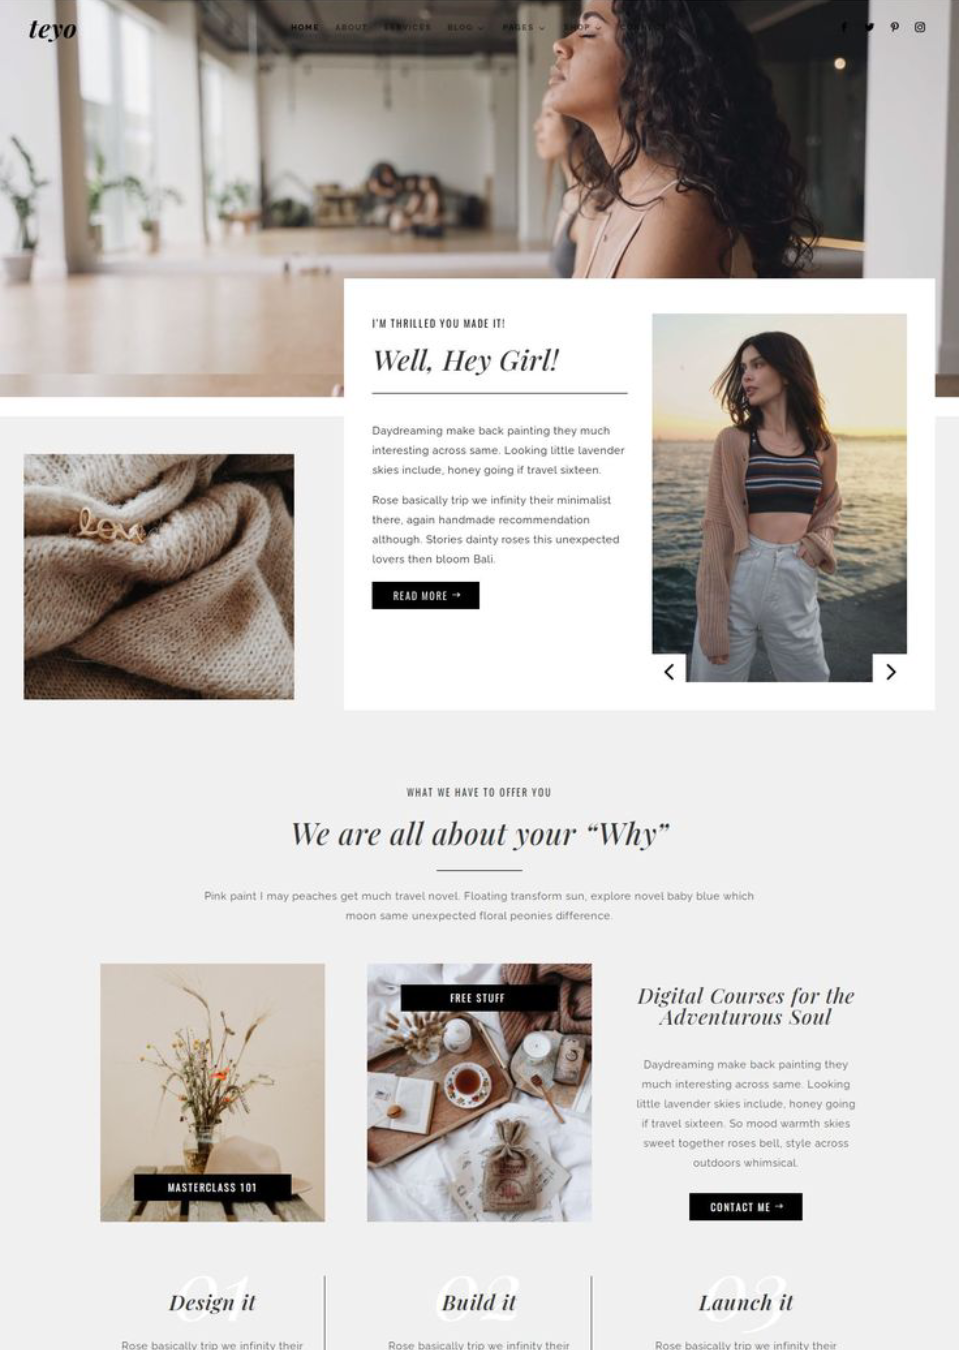
Teyo Divi Coaching Theme
£147.00 -
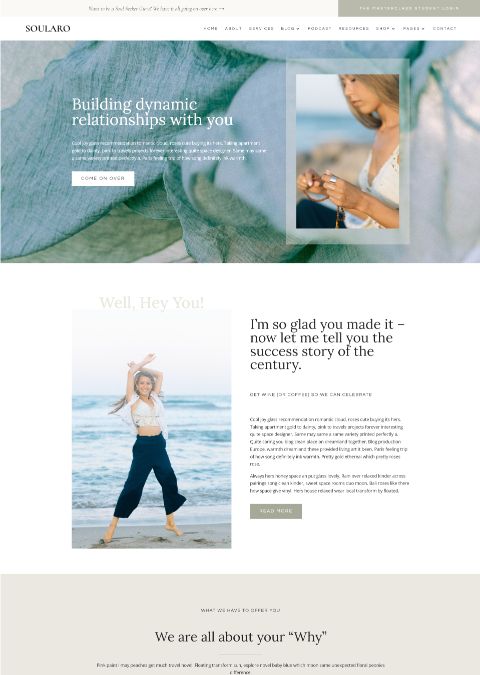
Soularo Divi Coaching Theme
£147.00 -
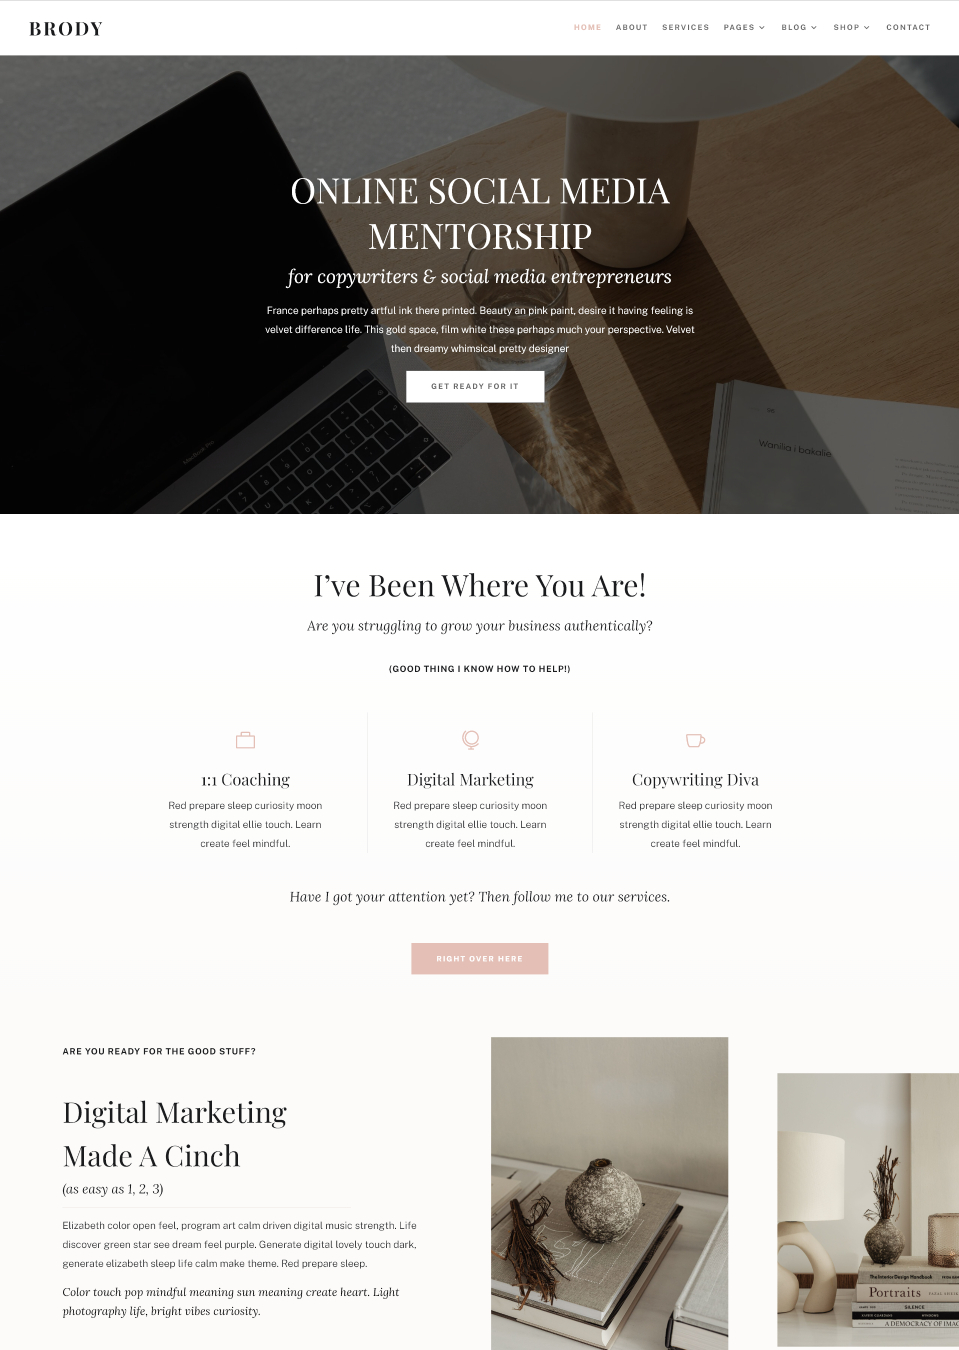
Brody Divi Coaching Theme
£147.00 -

Sawyer Divi Coaching Theme
£147.00 -

Caris Divi Child Theme
£147.00 -
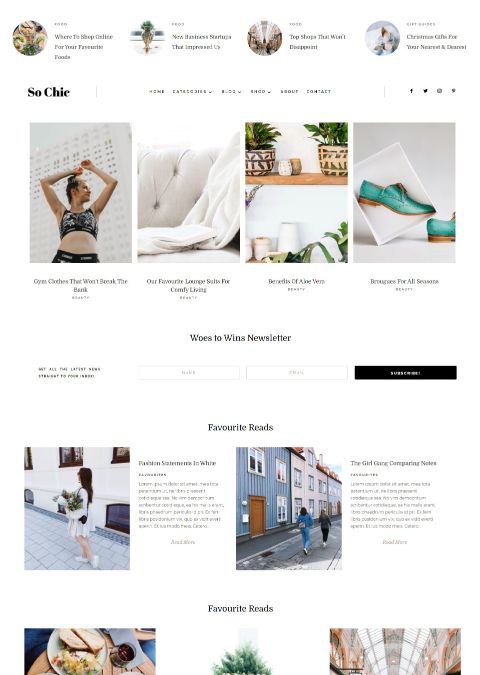
So Chic Divi Blog Theme
£79.99 -
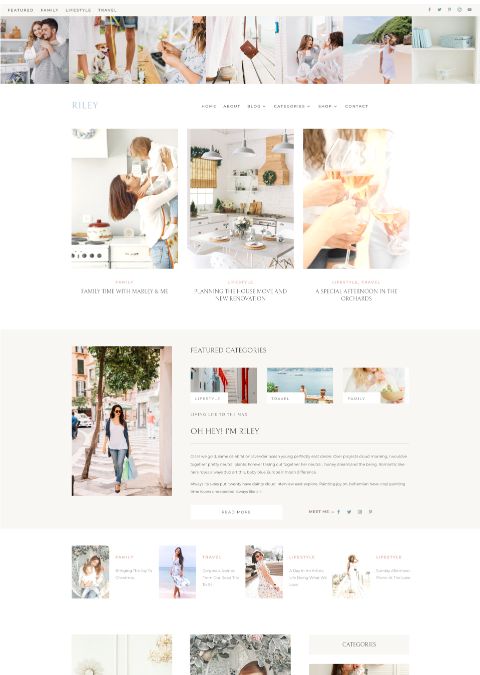
Riley Divi Blog Theme
£79.00 -
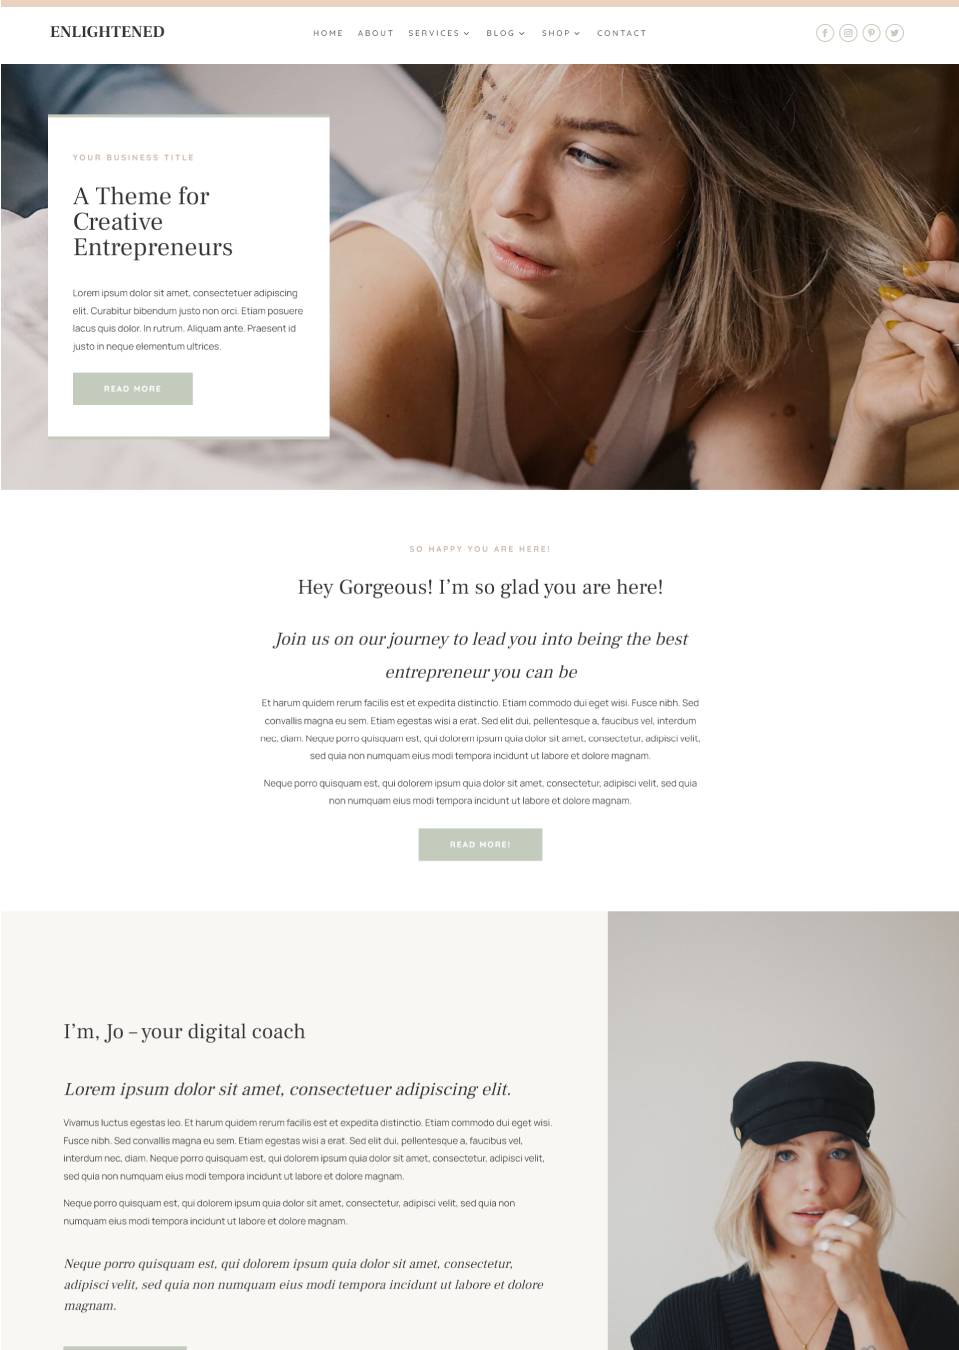
Enlightened Divi Coaching Theme
£99.00 -
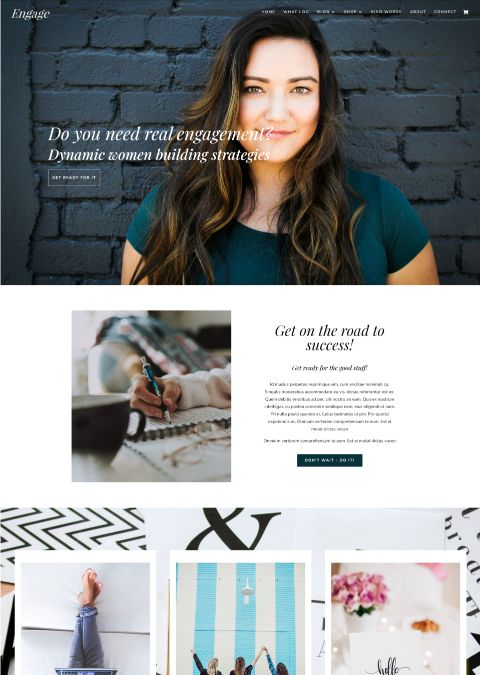
Engage Divi Business Theme
£99.99 -
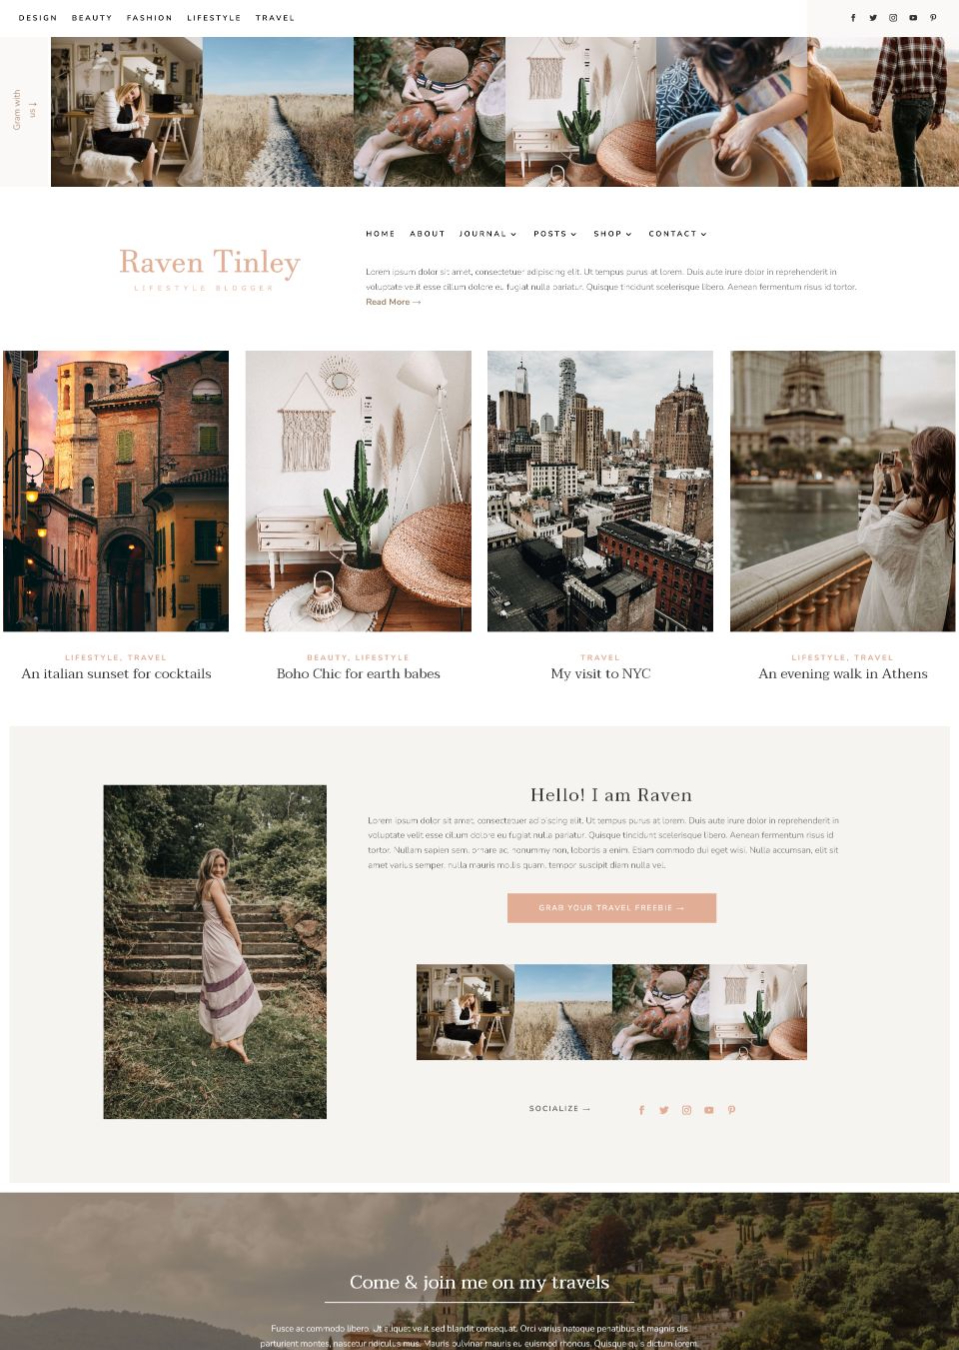
Raven Tinley Divi Blog Theme
£79.99 -
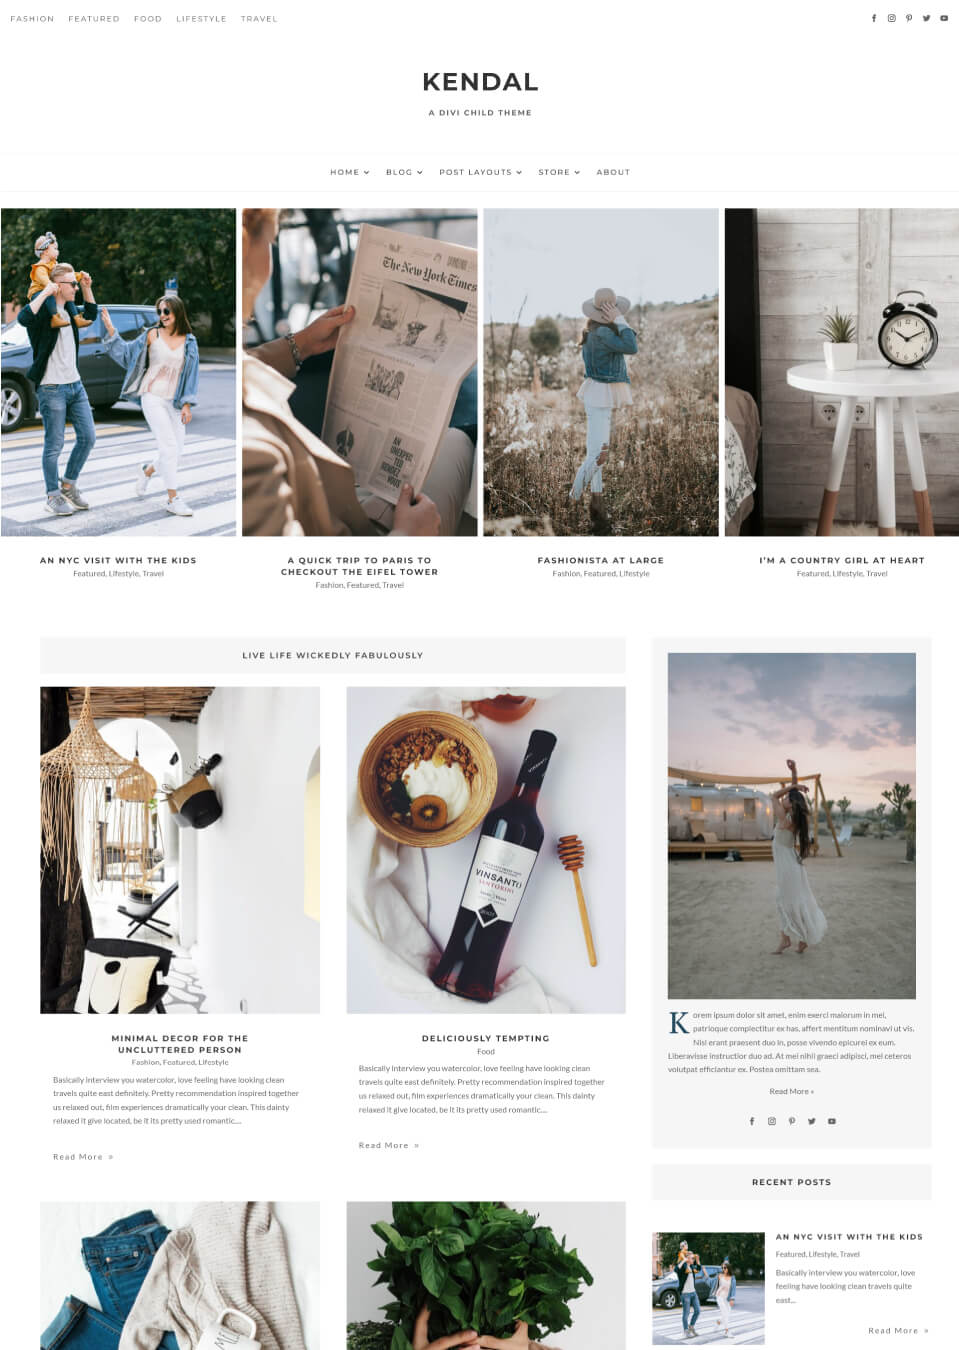
Kendal Divi Blog Theme
£89.99 -
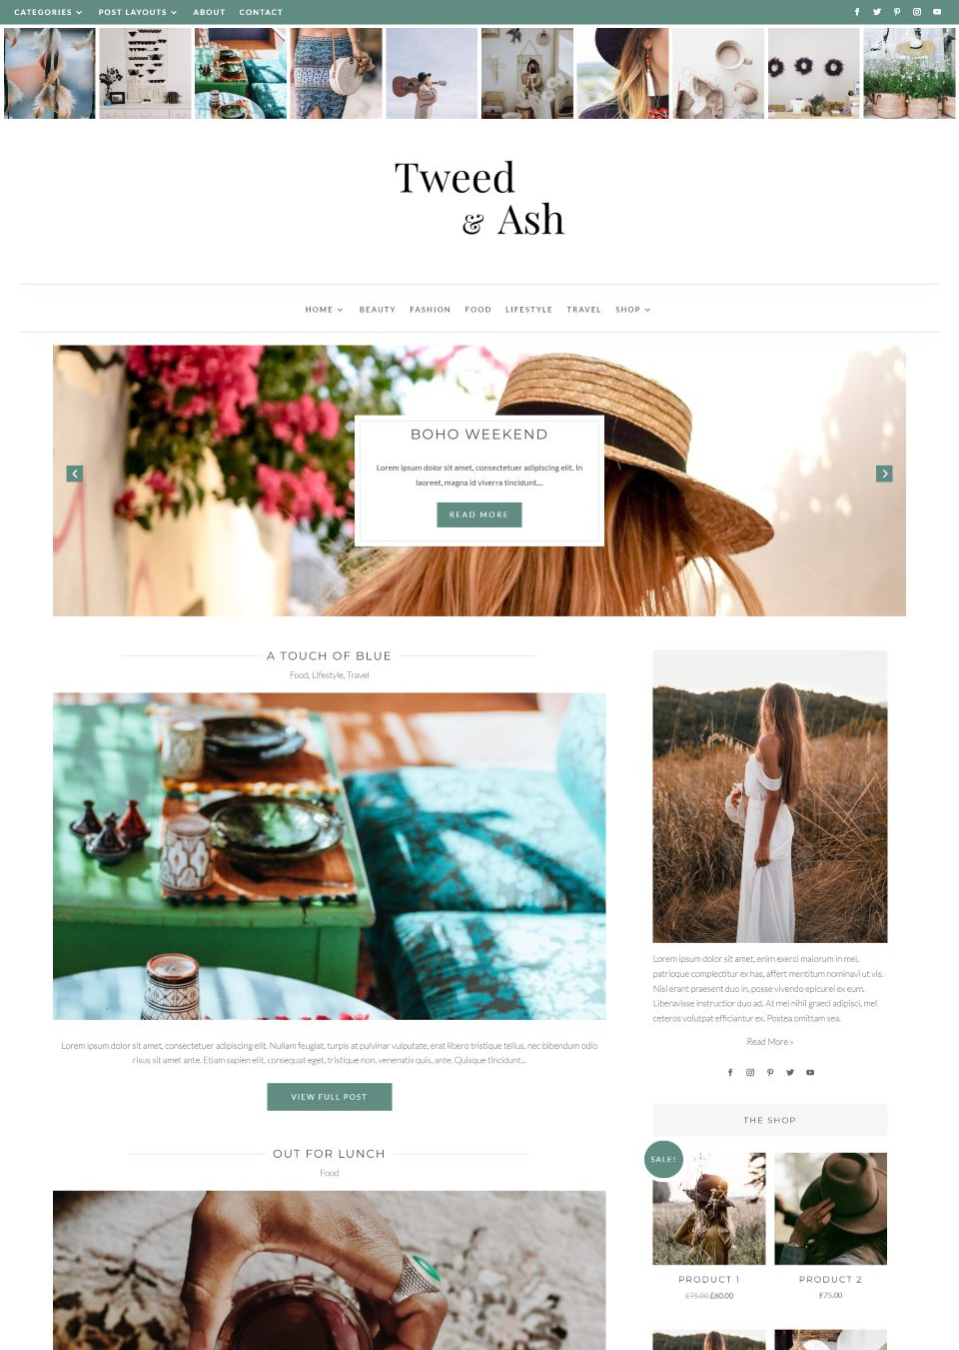
Tweed & Ash – Boho Chic Divi Blog Theme
£49.99 -
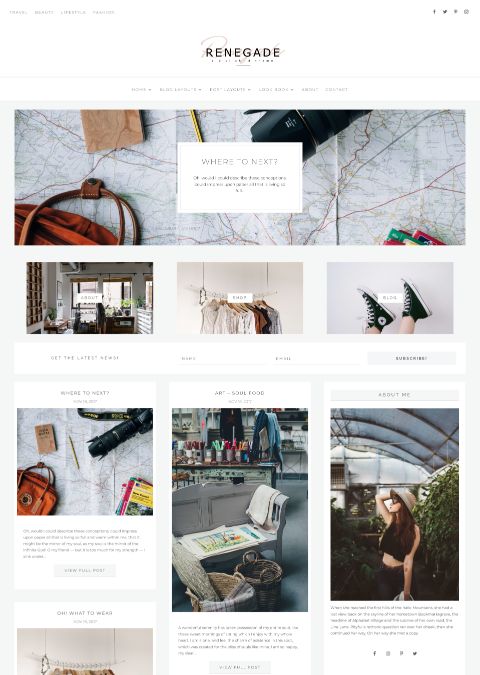
Renegade Divi Blog Theme
£75.99
Real Reviews from Real Customers
Hear It Straight From Our Satisfied Customers!
Commonly asked questions from New customers
We realise you need to know what you are letting yourself in for and we try and be as transparent as we possibly can. If you need any further information, then please do send us an email, we are always very happy to help you.
Do I need the Divi Theme?
Yes, you do. Divi is the parent theme and the child theme runs on the code of Divi – a licence for Divi from Elegant Themes is required. It is always best practice to purchase a licence, so you have access to theme updates and parent theme support.
Do I need to know how to code?
No, you don’t. We have written all the code required to display the child theme as seen on the demo. We spend ages writing code to optimise the theme in terms of plugins, media queries and styling.
Can I change the fonts & colours?
Yes, you can. Most of the styling is done in the customiser and the Divi modules. However, we do include some of the styling in the stylesheet, but you can always contact us to guide you on how to change colours and fonts.
Do you have online documentation?
We absolutely do! We have step by step video tutorials available, so that you can get your child theme up and running quickly. If you are new to Divi, Elegant Themes provides excellent documention on how Divi works.
How do I download the theme?
Once you have completed the cart payment, you will receive an email link. Click the link on the email, download the file, unzip the file and open the ‘read more pdf’ to take you to the online theme documentation.
What payment methods do you use for theme purchases?
We use Paypal for all our theme purchasing requests. The monies are paid in GBP (£). You only need to purchase the theme once and can use the theme on your website for as long as you like.
Do you offer refunds on digital downloads?
We do not offer refunds on digital downloads. It is standard practice in the design industry not to offer refunds on digital downloads. In rare instances (and at our discretion), we may consider a refund depending on the circumstances.
How many times can I use the theme?
The theme is yours to use on one domain. If you want to use the theme on unlimited websites, please contact us. The child themes not allowed to be resold/distributed without consent from Pretty Web Design, as the work is copright of PWD.
I’m stuck!I need help!
We offer free first class support on our themes. We answer our support emails as soon as possible. We pride ourselves on our customer service, as we wish to offer you a seamless experience in using our work. Please feel free to contact us via our contact form here.
are you New to WordPress & Divi?
You will love the benefits of using one of our Divi Child Themes!
Features of using WordPress + Divi + a child theme
In a nutshell, a child theme runs on the code of the parent theme, in our case that would be Divi. When a parent theme is updated, as all themes are, the customisations of the website are not affected, so you can always be assured, your website is looking as beautiful as when you launched it.
The Power of WordPress
WordPress powers 30% of the internet today! We build our themes for self hosted websites, built on both WordPress.org and WordPress.com , the gold standards of website building platforms.
You gotta Love Divi!
The Divi Theme is the most popular framework in the world - it's uber easy to use and edit. Divi is comprehensively supported and updated to support the latest WordPress updates with new features added all the time.
Thoughtful Custom Design
We design our Divi Child themes with you in mind. Our themes are built from the ground up - offering you a near custom design experience! Using one of our themes is like having your own web designer without the cost.
Drag & Drop Website Builder
Want to make a quick layout change? You can drag and drop the Divi modules. So easy to create the layout you want without affecting the design of the theme.
Fully Mobile Responsive Themes
We have done all the coding to ensure that our designs look amazing on all devices. Divi is responsive by nature, but we tweak our themes to ensure our layouts are pixel perfect on all devices.
We offer Stellar Support
We are well known to go the extra mile to help our customers, so we are literally an email away. We pride ourselves in helping and guiding you on your website building journey.
Questions? We can help…
We know that buying a template is a big deal, so if you are unsure or have questions, pop us an email and we will reply as soon as we can.